
Expert tips
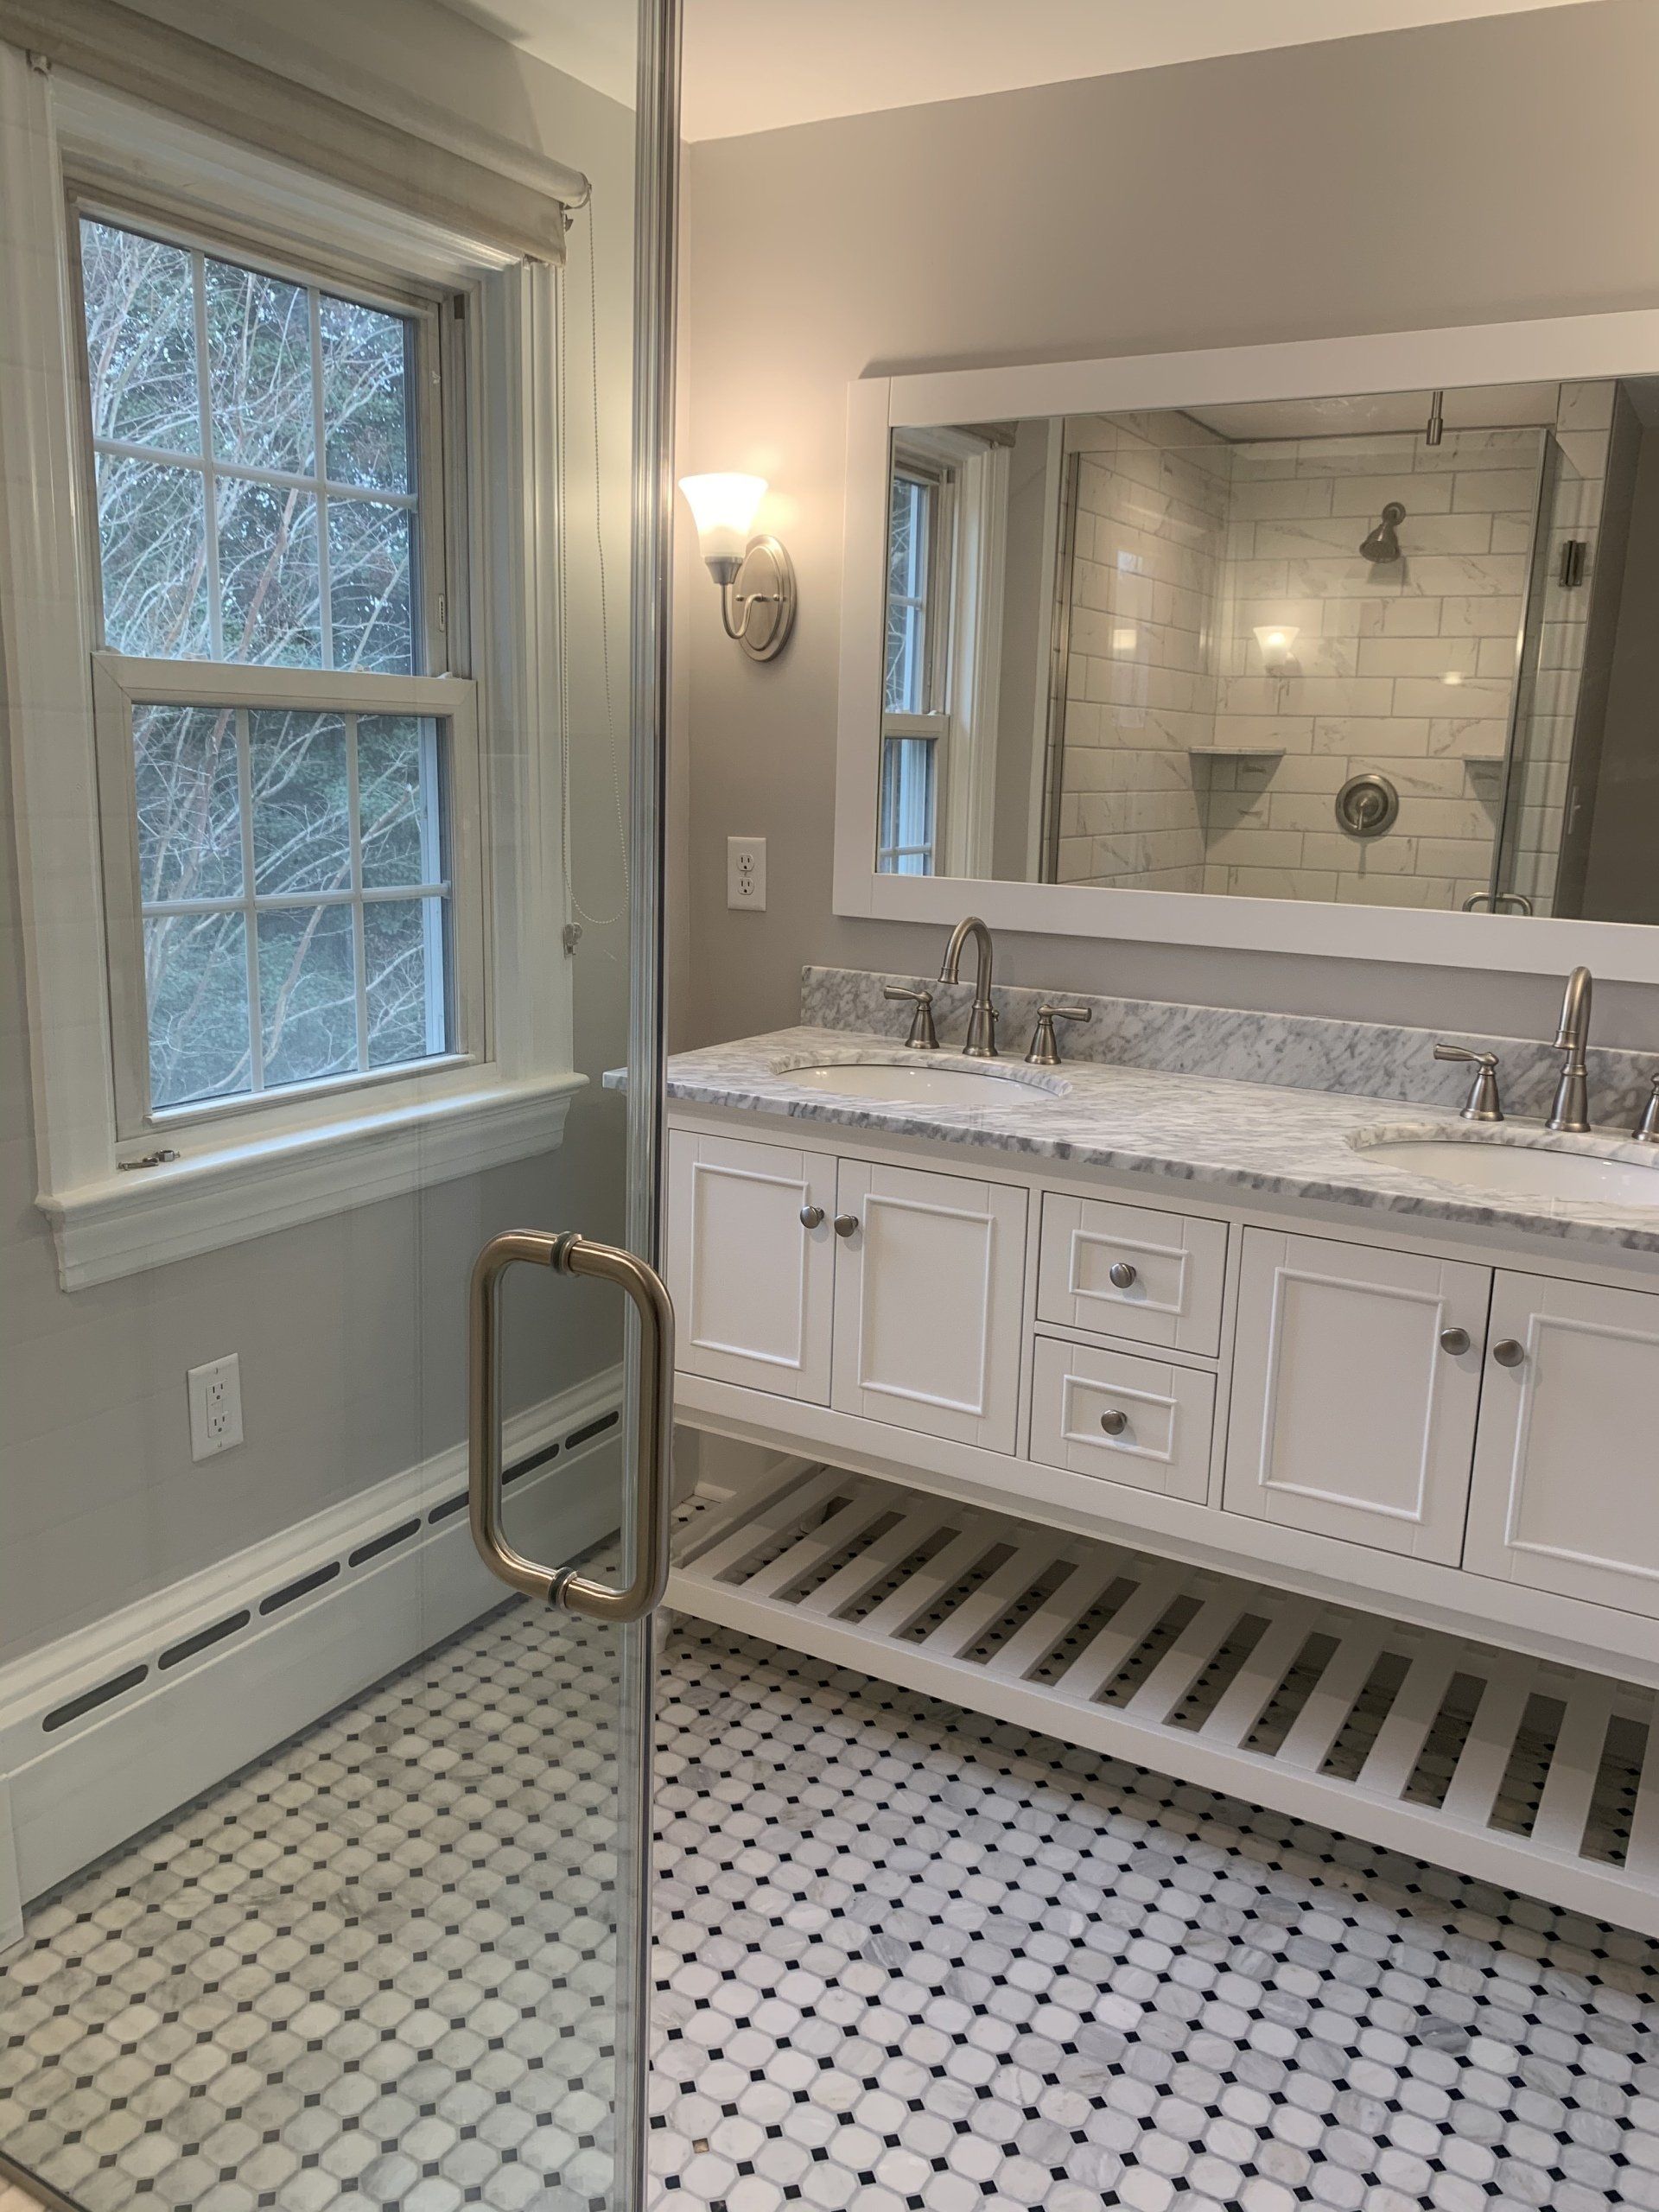
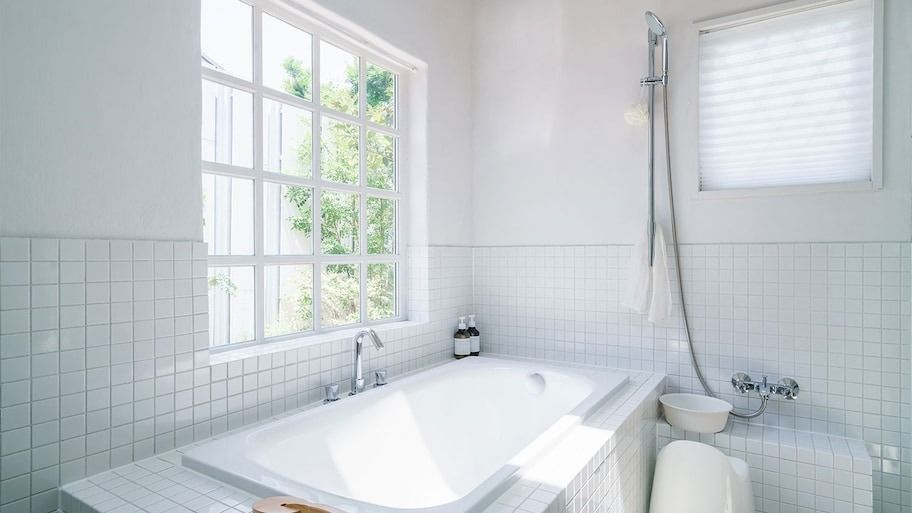
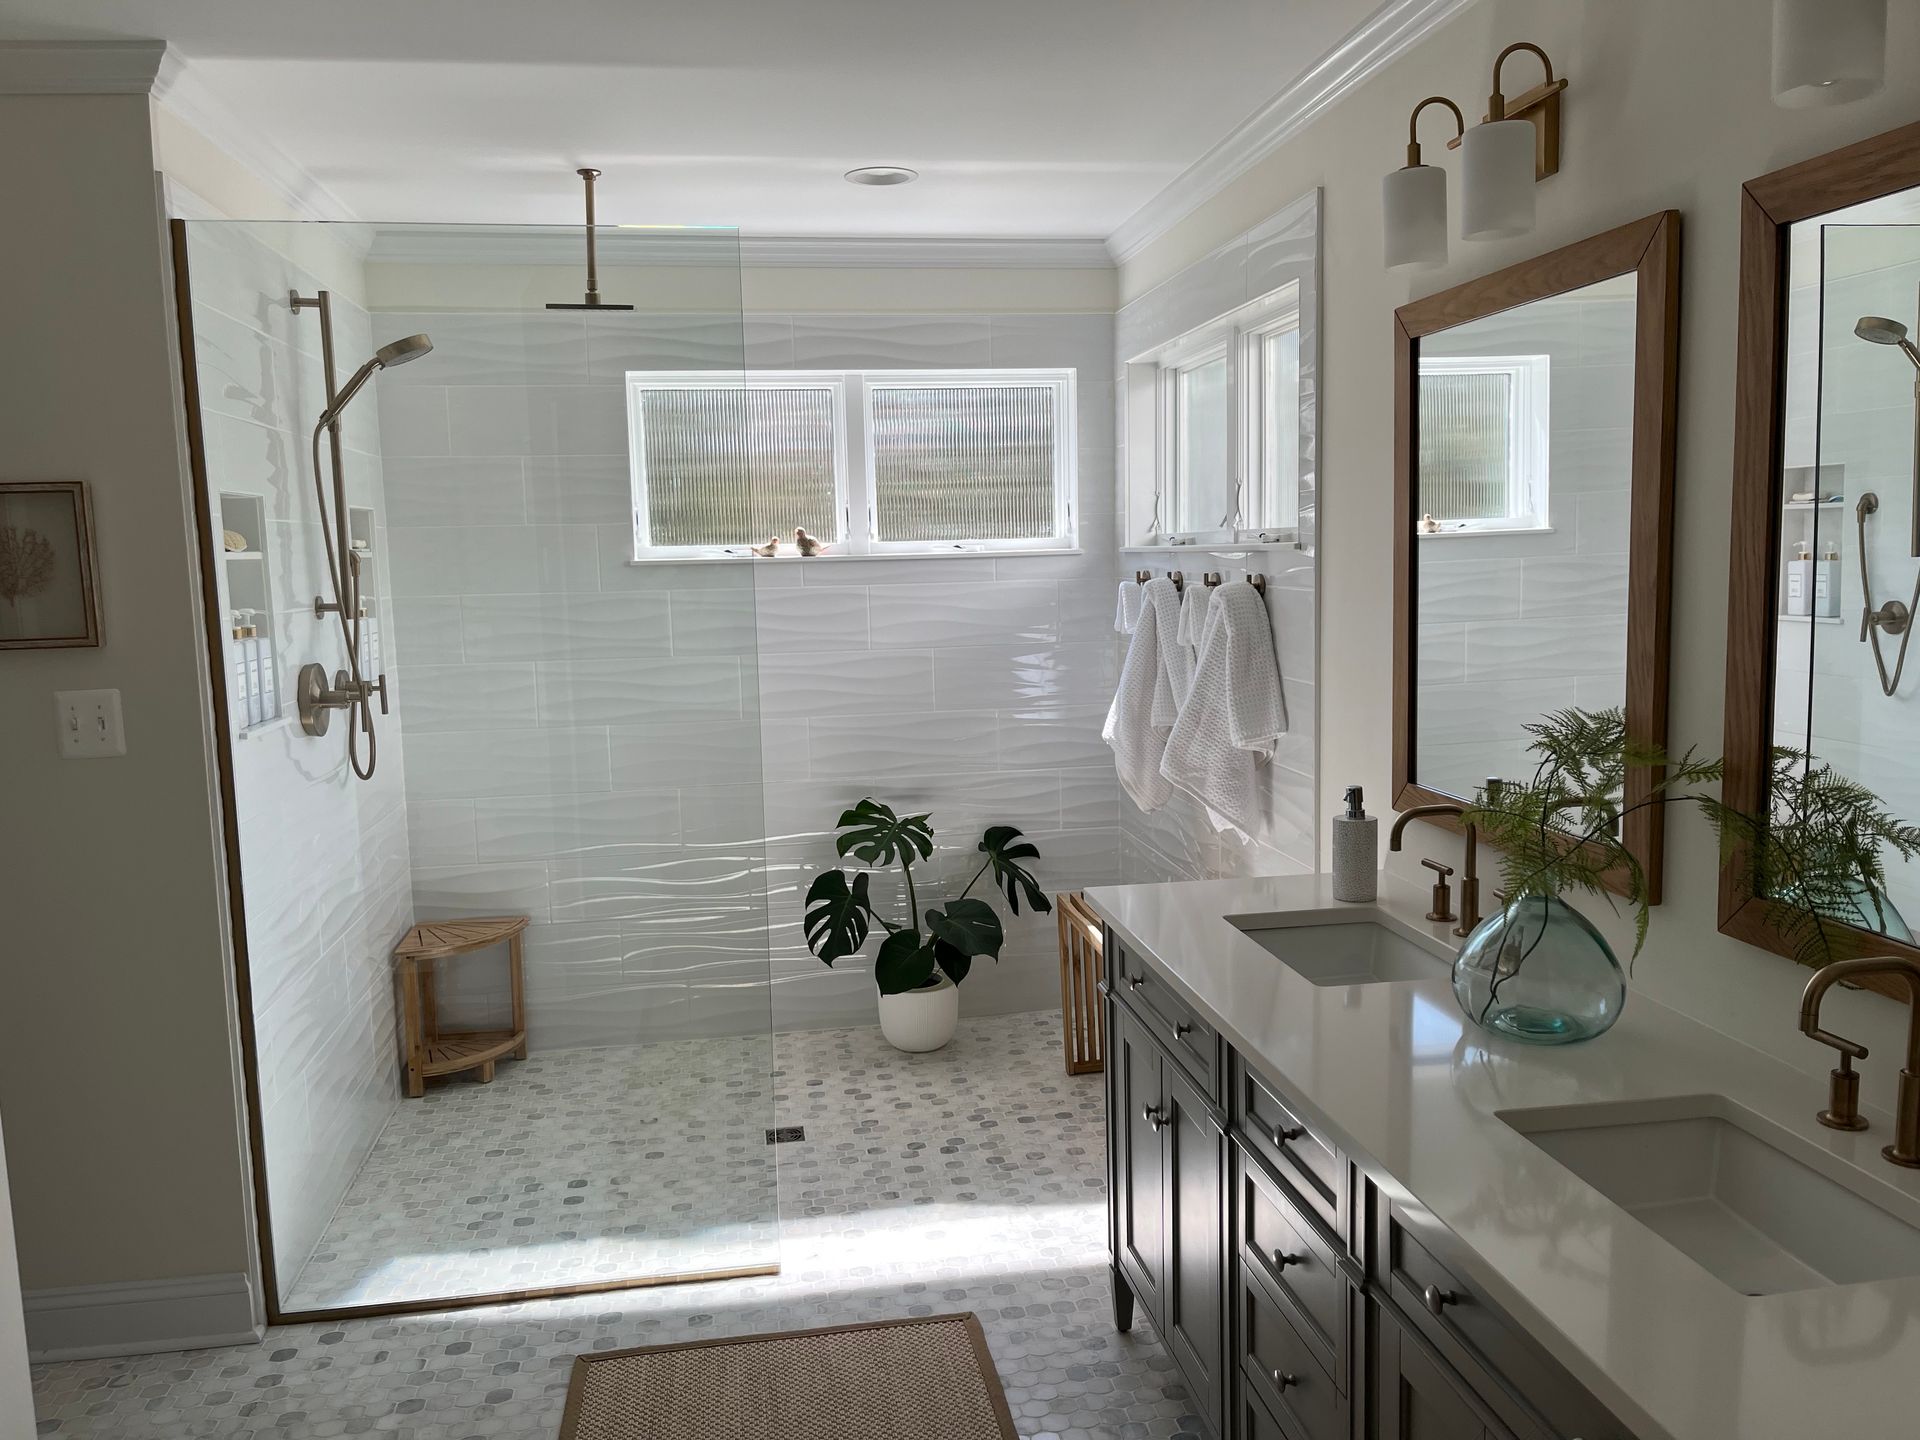
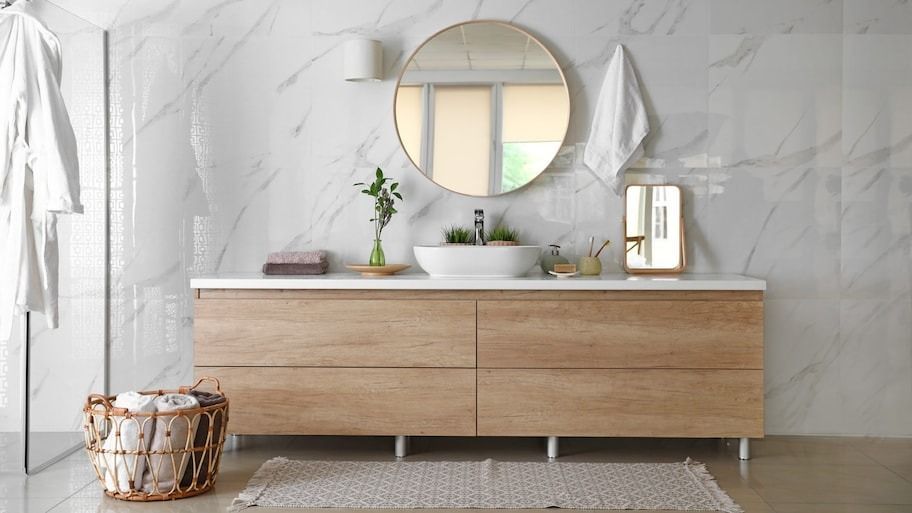
A bathroom can make or break a home purchase deal. And while a bathroom remodel may not necessarily recoup every cent you spent, it’s one of the most value-added improvement tasks you can take on if you’re thinking about selling. Here’s what you need to know about the best bathroom upgrades for resale value. Why Do Bathroom Remodels Add Value? Bathrooms (and kitchens) are where people spend the most time in their homes. So, a professional bathroom revamp is likely to get attention when it’s time to show your home to potential buyers and entertain offers. In fact, homeowner investment in renovation and remodeling projects grew almost 3% to $420 billion in 2020, as a study by Harvard University’s Joint Center for Housing Studies (PDF) found recently. Bathroom remodels usually have the highest return on investment (ROI). The average national ROI on a bathroom remodel is about 72.7%. That means that for every dollar you spend improving some part of your bathroom, you’ll see a $1.72 increase in the value of your home. To get the most out of your remodel, spend some time researching the most valuable upgrades for resale, desired finishes, and trends in bathroom design. Which Bathroom Features Increase Resale Value? Upgrading your bathroom can increase your home’s resale value, but for maximum return on investment, carefully evaluate your home and current bathroom and how it matches up with buyer priorities. Maximize your budget by choosing bathroom remodel ideas and upgrades that fit your home, neighborhood, and home value while aiming to improve usable space and quality. Bathroom Addition If you only have one bathroom, consider adding a new one instead of spending money to makeover the existing one. That’s especially true if you have more than two bedrooms; buyers with young children almost always expect more than one full bath to make evening bath time easier. For your investment in a bathroom addition, you can expect a return of about 55% for either a midrange or an upscale addition. Upgrade to a Walk-In Shower If your current shower is ugly, dated, hard to get into, or part of an old shower-tub combination that isn’t very inviting, consider replacing it with a walk-in shower. Partially fueled by home improvement shows that feature bathrooms with gorgeous, spa-like walk-in showers, many homebuyers are seeking bathrooms that look like and function as luxurious oases. Along with spacious, convenient places to bathe, walk-in showers also offer better accessibility and safety, help save water, reduce upkeep and cleaning time, and make bathrooms look modern. Call a local bathroom remodeler to learn what it will take to convert your tub to a walk-in shower. Refinish a Bathtub Ugly bathtubs make bathrooms appear dated, dirty, and undesirable. And that’s not what you want when selling your home. An easy and affordable way to make your bathroom look better is to refinish existing bathtubs that are in otherwise good condition. Refinishing is the process of sanding down and recoating a bathtub with a new finish, and bathtub refinishing costs can be surprisingly low. You can do it yourself with refinishing kits available at hardware stores or if you don’t have the time or desire to DIY it, hire a bathtub contractor to reglaze it for you. Refinishing lets you choose a new color, cover scratches and damage, get rid of stains, preserve the existing tub for years to come, and skip the expense and disruption of replacing an old tub. Vanity, Faucet, and Countertops It’s a relatively small part of your bathroom real estate, but an upgrade here packs a seriously positive punch. Consider swapping out a pedestal sink for a double-sink vanity with storage. Or upgrade your countertops to a more durable, modern finish like granite. If you make smart material choices, you can expect to recoup much of your bathroom remodel cost related to vanity and countertop upgrades. Flooring If the grout is beyond scrubbing, the tile looks dated, or the flooring is vinyl or a less-desired material, replace the floor with ceramic or porcelain tile for a long-lasting waterproof finish. If you’re in an area where winter weather runs exceptionally cold, consider installing heated floors in your bathroom to make morning showers much more pleasant. Radiant flooring is highly desirable and very efficient. For these reasons, you can expect a very good return on your investment—up to 100% in some cases. Cabinets Even something as straightforward as swapping outdated hardware for a sleeker finish (such as brushed nickel or bronze) can liven up the entire bathroom. Also, consider refacing sturdy and functional cabinets for a more modern look that will appeal more to potential buyers down the road. Retiling the Surround If the bathtub itself is in good shape, with no nicks, rust, or discoloration, then you can save some money and still see a significant improvement by simply replacing the bathtub’s surround or wall. A professional tile contractor should change or replace your tile. Lighting Lighting fixture updates can greatly impact the overall look and feel of the entire bathroom. Outdated lighting can often make the space look outdated or even dingy and drab. That’s especially true if you do any other aesthetic updating, such as painting the bath or adding new cabinetry or hardware. Look for modern lighting fixtures that match the finish of the bathroom fixtures, and choose a variety of light sources to provide both soft ambient lighting and bright vanity lighting. Ventilation Ventilation improvements not only make the bathroom more pleasant to use but can also help prevent mold or mildew growth on the ceiling. If your ventilation is less than ideal, consider updating it to protect your investment. Accessibility As the U.S. population ages, accessibility will be an increasingly important concern. Future homeowners who can’t access the home’s most important features may not want to go to the expense of renovating the space themselves. Widening doorways, adding support bars, and changing a standard bathtub to a walk-in shower area are valuable remodels that will help improve your home’s resale value. How to Improve Your Bathroom Remodel ROI When remodeling for resale, getting a bigger return on your investment is the goal. Carefully review your options and research the upgrades that will get you the biggest bang for your remodeling buck. Here are some of the best ways to spend your bathroom remodeling budget. Prioritize Repairs Over Cosmetic Changes Sometimes, the remodel budget means that you must make some potentially difficult decisions. How well your bathroom serves its function is much more important than how it looks. So, if there’s any aspect of the room that isn’t up to par, fix it before upgrading the flooring or the bathtub. If your bathroom suffers from any items that need repair, like leaks or dripping fixtures, cracked tiles, water infiltration, or mold, you’ll definitely want to prioritize those repairs over cosmetic changes. Focus on Low-Cost and DIY Upgrades Another way to increase the ROI on your bathroom upgrades is to choose low-cost projects you can do yourself in a weekend or so. DIY upgrades for your bathroom can include: A fresh coat of paint that delivers a powerful facelift to a tired bathroom. Blue bathroom paint can increase a home’s resale value by more than $5,000. Swapping out your existing lighting for a fixture that’s a little more up-to-date. Adding vertical shelves for more attractive storage options. Replacing your existing mirror with a newer model. Installing a new low-flow toilet with a more modern, elongated design at comfort height. These upgrades will cost much less than major remodels yet will still revive a lackluster bathroom’s look and feel for potential home buyers, thus adding to your resale value. Think Twice Before Investing in a Luxury Remodel Luxury upgrades tend to offer a lower return than standard remodels in some markets. Decadent upgrades that don’t fit the home’s overall value can make a remodel seem out of place. Some buyers shy away from homes with too-fancy bathrooms that don’t fit their lifestyle. If you plan to live in your home for a while and want a luxury bathroom, go ahead and splurge. But if you’re putting your home on the market or are banking on an upscale bathroom remodel to dramatically improve your home’s value, you might want to proceed with a remodel with lower upfront costs. Keep Your Design Neutral If you’re remodeling your bathroom with an eye on maximizing your ROI, it’s best to keep all your design choices fairly neutral. Stick to a neutral palette and choose a bathtub, cabinet, vanity, and fixture styles that are fairly classic or traditional. Of course, if you’re planning to stay put for a few years, you might opt to exercise your design flair and get as creative as you like to fit your own design preferences. Talk to Your Local Real Estate Agent Before you make a final decision about upgrading your bathroom in anticipation of a sale, ask your real estate agent to tell you what home improvements will bring the highest ROI in your area. This answer can definitely vary from place to place, and your agent is in the best position to give you the scoop. Then, to make sure the job’s done right, hire a professional home remodeler in your area to complete the work. Annie Sisk contributed to this piece. Remodels That Won’t Bring in a Significant ROI Not all bathroom upgrades or modern bathroom ideas will add a lot to your home’s resale value or its appeal to potential buyers. For example, jet tubs and steam showers might seem like a great idea in theory, but in practice, they can be difficult to maintain and frequently break down, requiring home repair visits that quickly add up. That said, if adding a jet tub appeals to you, and you’re prepared for the added expense, by all means, add it and enjoy! Just don’t expect any significant ROI on these upgrades. Cost to Remodel Your Bathroom Remodeling a bathroom costs between $6,630 and $17,540 , depending on the materials and fixtures you choose and the size of your bathroom. The average cost for most bathrooms will be about $12,000 . Luxury features like heated towel racks, rainfall shower heads, and custom cabinetry can all increase the price of your remodel, while choosing pre-made parts for your shower surround, vanity, and storage can all reduce the cost. DIY vs. Hiring a Pro Because this project involves plumbing and electrical work, it requires help from a local bathroom remodeler. While you might choose to DIY some smaller tasks like tile work, installing fixtures, or painting to reduce the price of labor on your project, doing your own plumbing or wiring isn’t a good idea. Original post by: Becca Lewis Original Post: https://www.angi.com/articles/which-bathroom-features-increase-resale-value.htm?CID=SEM.E001.P001.M002.G002.V000.C000.X000.Y000.Z000&c_id=%7BAdId%7D&disablegtm=true&entry_point_id=32985368&entry_point_id=32985368&gad_source=1&gatc=%7BBidMatchType%7D&gclid=CjwKCAjwps-zBhAiEiwALwsVYWCZQubWw8wTooP7-zpElDQq3CTgaJXNJy_144cC4Z4TspaaQme7MhoCelIQAvD_BwE&iv_=__iv_p_1_a_928634121_g_45147435286_w_kwd-300767045024_h_9007999_ii__d_c_v__n_g_c_575957806775_k_angie_m_e_l__t__e__r__vi__&kw_id=%7BOrderItemId%7D&m=cammgsemalb
A newly remodeled bathroom is a game-changer: it boosts your mood, adds style and function to your space, and increases your home’s value. But remodeling a bathroom can be tricky; there are several bathroom remodel problems to be aware of and dodge. Check out these bathroom mistakes to avoid to ensure you end up with a stunning space that offers optimal function and style. 1. Lack of a Clear Remodel Plan and Budget A bathroom remodel can be exciting, but before ripping out your toilet and vanity, map out the details of your bathroom remodel. Use a bathroom remodel checklist to ensure you don’t miss any critical pieces. And be sure to estimate the cost of the bathroom remodel to craft your budget. Work with local contractors to get quotes on the work so that you can plan accordingly. Ensure you have the funds to cover the full cost, so you don’t have to press pause while in the middle of your renovation. 2. Forgoing Function and Storage While a beautiful bathroom can bring energy to the room, the most important aspect of your bathroom remodel is its functionality. Think about who will use your bathroom and how they’ll use it daily. Do you want to easily access your electric toothbrush and keep it off the counter? Consider a medicine cabinet with an outlet for charging. Need space for lots of towels and toiletries? Ensure your vanity offers plenty of storage, and consider adding shelves above your toilet too. 3. Not Planning Your Color Scheme and Style The final look of your new bathroom depends on your color scheme, vanity, and other design elements. Gather inspirational photos of bathroom designs you like and follow tips for bathroom remodeling . Create a mood board and vision for your project, or work with a bathroom designer to nail down the details. You don’t want to get to the end of the reno and feel like your bathroom isn’t cohesive or what you hoped for. 4. Forgetting About Sizing and Spacing You don’t want a vanity or tub that looks too big or small for your room. Plan out the sizing and spacing meticulously or enlist a local bathroom remodeler to ensure your design is right. Take note of where your plumbing fixtures are—your toilet, tub, shower, and sink. Keep the fixtures in the same locations, or add more to your budget (if you can) to change them. Many homeowners don’t enjoy having the toilet be the focal point when you enter the bathroom. Consider tucking it in behind the door or beside a vanity to ensure it doesn’t take center stage. 5. Choosing Lighting That’s Too Dim or Too Bright Plan for both bright and softer lighting options in your new bathroom. That way, you have the right lighting, whether you’re putting on makeup or soaking in the tub after a long day. Consider layering your lighting, like recessed lighting on a dimmer, sconces on either side of the vanity, and a separate ceiling pendant above your shower or bath. No matter your mood, you can adjust the lighting to fit. 6. Poor Ventilation Poor ventilation in a bathroom leads to mold and mildew and the deterioration of the beautiful bathroom you’ve just remodeled. Ensure you install the right ventilation (usually needs an outside wall) and exhaust fan. 7. Improper Drainage If you're planning a seamless walk-in shower or wet room, be mindful of proper drainage and waterproofing. You'll need the right slope, gradient, and sealing in your design. Make sure the water runs directly and swiftly into all your drains. The last thing you want is leaking or flooding; these are often costly and time-consuming mistakes to fix. 8. Unsuitable Materials One of the biggest bathroom mistakes to avoid is choosing materials that don’t belong in the wettest part of your home. Instead, select materials that hold up to everyday wear and tear, moisture, and temperature change—otherwise, expect warping, staining, and deterioration. The best materials for a bathroom are glass, porcelain, tile, quartz, vinyl tile, ceramic, and natural stone. Marble is beautiful, but water can stain it, and it requires extra maintenance. 9. Tackling the Project Yourself When You Should Hire a Pro Some homeowners attempt plumbing or electrical work without the proper skills and experience. If you spring a leak or install your bathroom outlets incorrectly, you could have a more critical issue and need to call a contractor in the end anyway. Hiring a local contractor, plumber, or electrician can help save you headaches and money in the long run. You can also hire a bathroom remodeler near you to take care of the whole project for you. You can often save money by chipping in on certain aspects of the job, like prep work or clean-up. “We visit a lot of homes where the customer starts doing demo work in their bathroom and then realizes they're in way over their heads due to the plumbing problems they encounter,” says Nick Zindel, owner of Zintex Remodeling Group. “Some have done more damage trying to DIY versus spending the extra money to have it done right by a professional. One major benefit of hiring a pro is that the work will be under warranty going forward.” 10. Poorly Placed Hooks and Bars While it may seem straightforward, homeowners often don’t think of simple accessory placement until too late. Ensure you have wall space for towel hooks and bars and that you install them where you need them. A towel hook across the room from your shower is not only inconvenient but could cause water damage over time. 11. Not Upgrading Plumbing and Electrical Depending on the age of your home, your bathroom renovation could be the perfect time to upgrade your plumbing and electrical and ensure it’s up to code. You’ll want GFCI outlets in your bathroom, for instance. 12. Failing to Watch for Mold During your bathroom renovation, keep an eye out for signs of mold , such as black spots on walls or pieces of drywall that appear wet. 13. Forgetting to Take “Before and After” Photos It’s fun and important to track your reno progress and see the transformation of your bathroom remodel. Be sure to snap a few photos of your current bathroom, so you can place them next to photos of your new space once it’s complete. What Should You Not Do When Remodeling a Bathroom? When remodeling a bathroom, you should not change plumbing fixtures’ locations unless you have to, and you shouldn’t use materials that don’t hold up well to water and humidity. Original post by: Jenna Jonaitis Original Post: https://www.angi.com/articles/common-problems-bathroom-remodeling.htm?CID=SEM.E001.P001.M002.G002.V000.C000.X000.Y000.Z000&c_id=%7BAdId%7D&disablegtm=true&entry_point_id=32985368&entry_point_id=32985368&gad_source=1&gatc=%7BBidMatchType%7D&gclid=CjwKCAjwps-zBhAiEiwALwsVYWCZQubWw8wTooP7-zpElDQq3CTgaJXNJy_144cC4Z4TspaaQme7MhoCelIQAvD_BwE&iv_=__iv_p_1_a_928634121_g_45147435286_w_kwd-300767045024_h_9007999_ii__d_c_v__n_g_c_575957806775_k_angie_m_e_l__t__e__r__vi__&kw_id=%7BOrderItemId%7D&m=cammgsemalb
You can procrastinate about some cleaning tasks, but when it comes to mold, it’s better to take care of it sooner rather than later. Mold can cause health problems and destroy whatever it grows on. The spores of mold fungi commonly float through the air, and when they adhere to damp surfaces and start to grow, they can gradually consume the surface. The key is to get the cleanup done before that happens. Mold produces allergens that can cause reactions in some people, including hay fever-type symptoms. Even mold treated by a chemical or biocide can still cause allergic reactions, so in addition to killing mold, it also needs be removed, the U.S. Environmental Protection Agency says. Here’s how to work with a pro to get rid of mold in your house, and how to prevent mold from forming in the first place. Pristine Interiors by Eva Priest Where Mold Is Most Common A leaky roof or plumbing, flood damage, or indoor humidity that’s too high and without proper ventilation can all lead to mold problems. Unmitigated flood and water damage can lead to mold growth in as little as 24 hours, according to Gold Coast Flood Restorations in San Diego. Anyplace that remains damp and unventilated is a potential mold-forming zone. “Anywhere water travels” in a structure is vulnerable to mold, says Austin Reid, co-owner of Mold Masters in Southern California. That includes areas where major plumbing arteries are located, crawl spaces with drains, walls plumbed from bathroom to bathroom and between floors. Incorrectly sealed tubs and faulty construction can cause water to seep in crevices and create big problems over time, Reid says. Find a mold specialist on Houzz GM Construction, Inc. Regions where the weather tends to be damp or humid can be mold hot spots — but arid areas are not immune. Buildings that are tightly sealed may lack adequate ventilation, which can lead to moisture buildup, says the EPA. Mildew is another fungi-produced coating that can form on damp surfaces. Mildew usually grows in a flat pattern and appears powdery and white or gray. Mold is darker in color, usually black or green, and penetrates the surface of what it’s growing on. You may follow the same cleaning steps below to get rid of mold and mildew. How to Clean Your Windows and Keep Them Streak-Free Gold Coast Flood Restorations Most Mold-Prone Areas
As long as you have the budget, life’s too short to live without the bathroom of your dreams
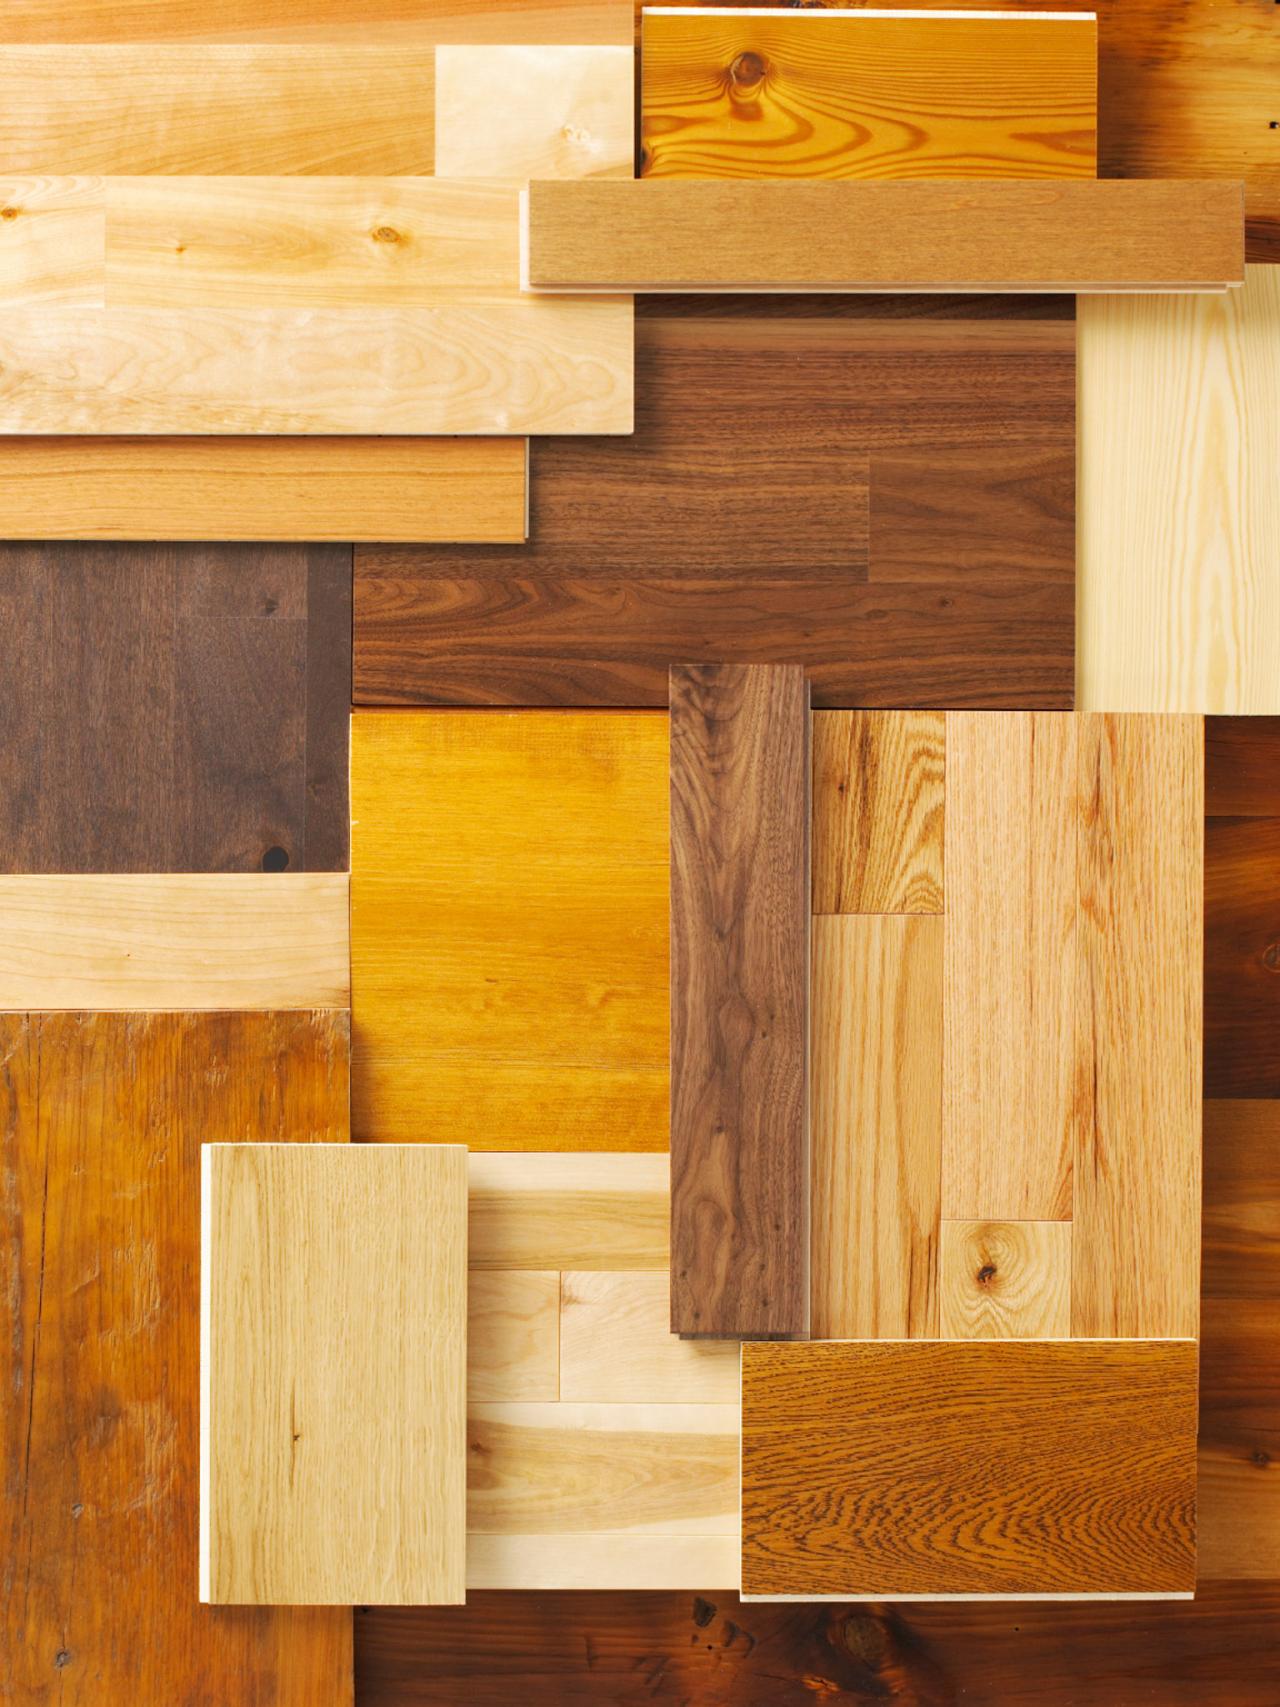
How to Choose Flooring To choose flooring, it’s best to start by determining what you need. Consider these factors: Room : Some types, like carpet or hardwood, aren’t ideal for every space Family Situation : Young children or pets need spill-proof and scratch-resistant flooring Budget : Price varies widely, so you need to know what you can afford Installation Requirements: Some materials need an underlayment or pad, which may cost extra Style: Certain types work better than others to create the right aesthetic Return on Investment (ROI): Higher cost or quality often means a better long-term investment Types of Flooring Materials There are six popular flooring materials used in residential homes, from classic hardwood to eco-friendly laminate. Additionally, there are several other lesser-used types that come with their own benefits. Use the below guide to choose which type or types are best for your space. 1. Hardwood Flooring Hardwood continues to be the top choice for its great appearance and long-term ROI. Pros : popular for its visually appeal many varietals available to vary color and style high ROI can be resurfaced every 3-5 years best for shared living spaces Cons : expensive compared to other top flooring materials can develop scrapes, scratches and dents over time can incur moisture damage 2. Laminate Flooring Their are several pros and cons of laminate flooring to consider when researching this material. Pros : lower price than hardwood ease of installation durability variety of colors and styles, like natural wood good for high-traffic areas Cons : prone to moisture damage difficult to repair not ideal for kitchens or bathrooms 3. Vinyl or Linoleum Vinyl flooring is not the cheap-looking alternative it used to be. These days, this synthetic flooring for the home is durable and effectively mimic wood, ceramic and stone. Pros : affordable versatile great for high-traffic areas easy to maintain DIY installation possible Cons : lower ROI vs. wood or laminate less popular due to appearance 4. Porcelain or Ceramic Tile Flooring Ceramic and porcelain tile flooring are beautiful options for high-traffic and moisture-prone areas in the home. Pros : come in a variety of looks and designs durable non-porous or waterproof great for kitchens, bathrooms and entryways Cons : one of the most expensive options difficult to install can chip and scratch under heavy use 5. Natural Stone Tile Flooring Natural stone tile is a classic flooring option that includes granite, marble, travertine and sandstone. Some materials, like travertine, are more durable than others. Keep in mind that finishes require different amounts of care. A polished marble surface will show scratches and scuffs more easily than a tumbled one, for example. Pros : durable insulated for warmth comes in many styles, colors and shapes great for radiant heating eco friendly good for homes with kids and/or pets Cons : one of the most expensive options can easily chip or scratch some stone tile types are porous expensive repairs 6. Carpet Carpet remains a favorite for many homeowners, especially for bedrooms. Pros : cost-effective soft and warm on feet multiple colors and designs available great for soundproofing stain-resistant varieties exist Cons : difficult to maintain – professional cleaning recommended at least once a year can absorb smells not great for homes with pets not recommended for moisture-prone areas: kitchen, bathroom New or Alternative Flooring Ideas If you’re looking for unique flooring materials that look great or have extra benefits like sustainability, consider these other types: Rubber: poured material non-slip surface great for the kitchen, indoor gym or play area Parquet : wood pieces arranged in a mosaic pattern usually costs more than other wood styles great for formal spaces Terrazzo : composite made of natural stone chips and resin dazzling design works well indoors and outdoors, depending on the style. Marmoleum : sustainable vinyl alternative custom construction great for bathrooms and kitchens Bamboo : eco-friendly and wood-like moisture resistant better for kitchens and decks than most woods Cork : low VOCs fire-resistant sound-blocking best for quiet areas Flooring Comparison Wondering which flooring is right for your home? There’s often more than one right answer when comparing factors like durability, comfort and style. Determine the most important factors for you to narrow down your choices of the best material or materials for your space. The most durable hard flooring types are: bamboo travertine vinyl sheet Best Type of Flooring for Dogs, Cats or Other Pets The ideal flooring for pets is non-slip porcelain or stone tile. This waterproof surface is less likely to scratch or wear underfoot. Best Whole House Flooring If you’re installing the same flooring for the whole house, you’ll probably want solid hardwood or tile. These materials work well in most rooms. Best Eco-Friendly or Sustainable Flooring Materials The best recycled flooring materials are bamboo and cork. Cork also provides additional insulation with an R-value about 1.125, the highest of indoor hard surfaces. Easiest to Install or Maintain Vinyl plank or sheet is the easiest to install or maintain. All you need to do is sweep it regularly and mop on occasion. Cheapest Type With prices running as low as $0.75 per square foot for materials, the cheapest flooring types are vinyl or carpet. Prettiest Flooring The prettiest flooring has a lot of character and comes in hardwood, natural stone tile or terrazzo. Best Old Flooring Types If you need to match old flooring in a home, look for solid hardwood or natural stone tile. These styles have been popular for centuries. Fire-Resistant Flooring The flooring types most likely to resist fire are stone or porcelain tile. They don’t burn or melt except at very high temperatures. Top Material for Soundproofing Cork or carpet are ideal options for soundproofing. Many homeowners prefer this for rooms like a young child’s play area or recording studio. Best Flooring for Radiant Heat The best flooring for radiant heating has a thickness of 0.375 inches to 0.5 inches in these materials: natural stone tile ceramic or porcelain laminate engineered hardwood Most Resilient for Kids The most resilient flooring for kids is carpet or vinyl. Children are more likely to spill or scratch surfaces, and these products can be easier to maintain. Top Flooring for Elderly or Disabled People The best flooring for people with limited mobility is rubber or low-pile carpet. These materials are soft and non-slip. Best for Resale Value Hardwood or tile are the ideal flooring choices for resale value. Hardwood in particular can have an ROI as much as 70% to 80%. Bathroom or Kitchen Flooring The best flooring for bathrooms or kitchens is tile or vinyl. These materials also go well in the mudroom. Living Room Flooring: Hardwood or Carpet Hardwood or carpet are the best flooring choices for the living room. They offer comfort and style without compromising durability. Dens or Family Room Flooring Ideas When you choose flooring for the den or family room, consider vinyl or carpet. These provide an ideal balance of comfort and durability. Durable Entryway or Foyer Flooring Tile or vinyl are the most durable flooring options for entryways and foyers. They are waterproof and scratch resistant. Best Kinds of Flooring for Laundry Rooms The best flooring for laundry rooms are vinyl or tile. These types can handle higher humidity and spills without warping or bleaching. Best Floor for Stairs or Hallways Carpet or hardwood are the most appropriate choices for stairs and hallways because they are easier to cut to unusual sizes. Basement Floors The best basement flooring types are tile, laminate or engineered hardwood. These materials handle higher moisture better than hardwood and can be installed on a concrete subfloor. Garage Floors The best option for this room is concrete. Installing garage floor coatings or garage tiles helps provide a non-slip surface that is easy to clean. Outbuildings: Barn and Shed Flooring The most durable flooring options for outbuildings are concrete or pressure-treated wood. These materials are moisture-resistant and hardy in hot or cold weather. Call us today for your new flooring! Original Post: https://www.homeadvisor.com/r/flooring-material-types/ Home Advisor
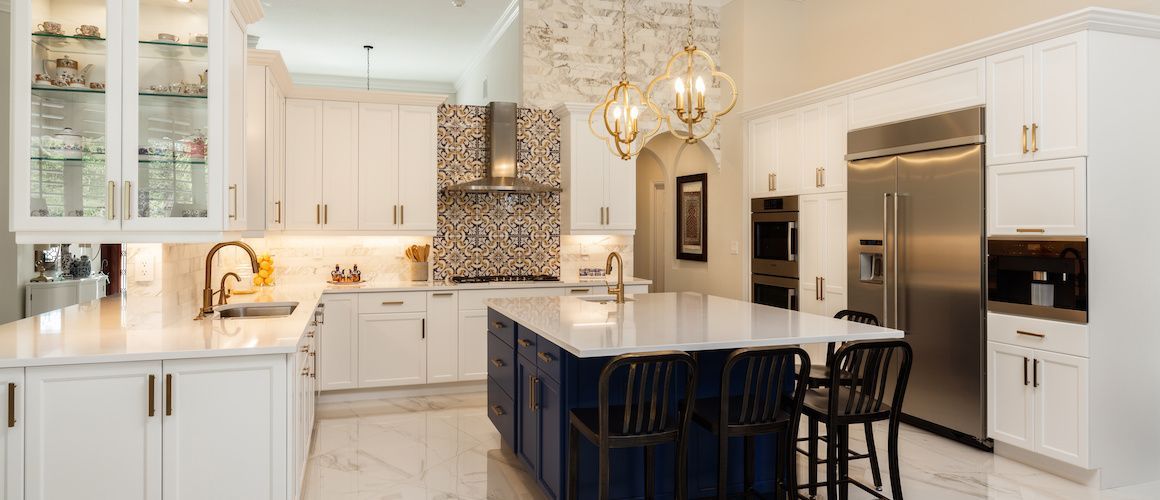
There’s an old saying in the real estate industry, “Kitchens sell homes.” Since the kitchen is central to the home and commonly used by families, it’s one of the first things many house hunters look at. Whether you’re renovating your kitchen to help your home sell or to create the kitchen of your culinary dreams, there’s some planning and budgeting you’ll want to do first. It can feel like the options for your kitchen are limitless, but unless you have a limitless budget, you’re going to have to pick and choose what’s actually important to you. Do you need more storage? Do you want more space for entertaining? Do you want a flow that works better for your family? Here are few questions you can ask yourself to help you narrow down your must-haves: What are the pain points of your current kitchen? What do you need more of? What do you need less of? Will you need to change the layout? What needs to be updated? Are you looking to sell soon? Which updates will add the most value to your kitchen? Set A Budget Now that you know what you won’t budge on and what would just be nice to have, it’s time to create a budget. According to HomeAdvisor, the average cost of a kitchen renovation in the U.S. is $22,129. The lower end renovations come in around $4,000, with higher end renovations reaching more than $50,000. How do you know what a realistic budget is for your kitchen renovation? A good rule of thumb is to spend 5% – 15% of your homes total value on your kitchen renovation. For example, if your house is valued at $200,000, a decent kitchen renovation budget would be 10% of that value, so about $20,000. Here are a few things you can do to get a more accurate budget and decide how much to allocate where. Divide Your Budget By Area Of Focus Let’s say you allocated $20,000 to renovate your kitchen. How do you know where to spend that money? According to HomeAdvisor and the National Kitchen and Bath Association, the breakdown could look something like this: Cabinetry and hardware: 29% Installation: 17% Appliances and ventilation: 14% Countertops: 10% Flooring: 7% Lighting: 5% Walls and ceilings: 5% Design fees: 4% Doors and windows: 4% Faucets and plumbing: 4% Other: 1% Be mindful that everyone’s kitchen needs are different, so these estimates are just that – estimates. If flooring is more important to you than countertops, readjust how you allocate that money. The important thing is making sure you’re not going over the budget you set for yourself. So, if you want to spend more in one area, make sure to balance it out by cutting back on another element. Visit Stores And Showrooms Visiting hardware stores and showrooms will give you an idea of what materials and options are on the market and how much they cost. If you’re looking to cut costs in certain areas, take a look at what a similar but less expensive option might be. For example, if you really like the look of natural stone floors in the kitchen, but that’s out of your budget, maybe opt for a ceramic tile that looks like natural stone. Or if you really want that high-end, custom cabinetry, invest your money there but choose a less expensive countertop option instead like laminate. Leave Room For A Professional Kitchen renovations, especially in-depth ones, require work you might not want to take on yourself, like actually installing electrical, plumbing, or cabinets, removing current cabinetry or knocking down walls. There are countless horror stories of homeowners getting their Chip Gaines on and rushing into demo day without being mindful of wires or plumbing in the walls. Bring In The Pros You know what you want, how much it’ll cost and how much you’re willing to spend. Now it’s time to hire the team that’s going to help make it happen for you! Than Merrill of FortuneBuilders, a real estate education company, says that one of the biggest mistakes homeowners make in their renovation projects is ignoring the benefits of hiring a kitchen designer, as well as a contractor. They can help you stay on track, on budget and on top of the job properly. Hiring A Contractor A contractor is the point person for the actual renovation. They source and provide all the materials, plan out the timeline for the project and hire the subcontractors who will be working throughout your renovation. Essentially, they’re what makes the project run smoothly and finish on time. Hiring a contractor is an additional cost, but they’ll have the best deals on materials and could end up saving you money in the long run. You can look for contractors in your area and read their reviews on websites, such as Angie’s List or HomeAdvisor. Friends and family can also be a great resource. Ask around and see who has worked with a contractor they’d recommend. Once you’ve narrowed it down to a few professionals you think might be a good fit, it’s smart to reach out with questions to help you determine if they’re the right person for the job. Some our suggested questions include: Are you licensed? Are you and your subcontractors insured? Will you obtain any necessary permits? Do you offer free quotes? What would the next steps be? Do you have different payment options? Will you handle the cleanup from the project? Will we have communication throughout the renovation project? Asking questions like these can help ensure you and your contractor are on the same page and could work well together throughout the renovation. Hiring A Kitchen Designer Kitchen designers won’t be working on the actual renovation like your contractor does. They are interior designers who plan out the design, style, layout and materials you need for kitchen renovations. While independent kitchen designers will be an additional expense, but if you’re using a national home improvement chain, kitchen designers often come free as an additional resource. While it won’t cost extra, designers affiliated with chains are limited to supplies and materials offered by that chain. Independent kitchen designers have the ability to source from different places, finding you the right price point and more variety. Be sure to vet your designer options like you would with a contractor. Search for local designers and read their reviews online. Ask family and friends if they worked with someone they’d recommend. You can always reach out to potential designers with additional questions like: Can I see samples of your past work? What is the communication flow like? What are your payment terms? Will we have final approval before elements are incorporated into the design? Install Electrical And Lighting Electrical renovation projects are no small feat and are usually best left to professionals. If you’re already working with a contractor, they’ll have an electrician lined up for this portion of the project. If you’re handling the renovation on your own, consider calling an electrician to handle or guide this these tasks. Some common electrical renovations are: Lighting Dimmer switches Wiring for dishwasher Setting up for a new range and oven Adding more receptacles on the countertop Wiring for garbage disposal Lighting Trends Statement Fixtures If you want your kitchen to make a statement, a bold pendant lighting or a chandelier could be the perfect fixture for your new space. Hidden lighting under your cabinets is a kitchen lighting trend that has gained steam in the last few years. It’s practical and stylish. One of the most popular features in modern kitchens and renos lots of light, “…especially under cabinets,” says Merrill. “It helps illuminate the meal preparation and cleanup process any time of the day.” The first step is to pick your paint colors. If you’ve been working with a kitchen designer, they’ll help you deliberate and find the right color for your home. If you’re picking colors on your own, here are a few things to keep in mind. Kitchen Paint Trends Neutrals still reign supreme in the interior design world, according to Derek Hales, the editor-in-chief of Modern Castle. “Neutrals are in around the entire home, but certainly the kitchen,” says Hales. “Some people are opting for an all-white kitchen, while others are bringing in soft, warm grays or even blacks.” To add interest while keeping a neutral wall color, Hales suggests accenting with interesting textures or colored dishes. “[It’s] a fun way to add variation without having bright colors on your walls,” adds Hales. Even deep, moody neutrals are becoming popular in modern kitchens. “Black is back and so is brass,” says Erica Reiner of E. Leigh Designs. “You can see black in everything from cabinetry paint, faucets, pendant shades to accessories, with pops of brass on the drawer pulls and knobs, faucets, pendants and accessories.” Lay Flooring After paint comes the flooring. Depending on the material you choose for your kitchen flooring, the effort required for installation will vary. For example, laminate or hardwood flooring doesn’t require any grout work whereas tile flooring will keep you a bit busier laying tile and grouting. Below are some common kitchen flooring options: Linoleum Many renovators who are on a budget opt for linoleum flooring because it’s an inexpensive flooring option that comes in countless shapes, styles and colors. You can find linoleum flooring that looks like wood, stone tile or classic colored tiles. Pros Inexpensive Stain resistant Nonabsorbent Biodegradable Low-maintenance Cons Easily dented and scratched Color can change if overexposed to sunlight Not recommended in high humidity areas Lower resale value Laminate Laminate flooring in kitchens is a highly debated topic in the renovation world. Many complaints center around the fact that laminate is not waterproof; however, many say that since moisture can be controlled in a kitchen, it’s not as much of a concern. Pros Low-maintenance Very durable Similar look to wood or stone Easy to install Cons Not waterproof Requires specific laminate floor cleaner Lower resale value Hardwood Homeowners and house hunters flock to hardwood because it’s naturally pretty flooring. Don’t believe me? Watch any show on HGTV and count how many times the homeowners mention hardwood. Hardwood can also last for a very long time, but not without some work. Pros Beautiful and versatile Durable Long-lasting, if properly maintained High resale value Cons Expensive Requires more maintenance than other options Should be sanded and refinished every 10 years Ceramic Tiles Last but not least is ceramic tile. Tile flooring has been popular in kitchens because it’s durable, easy to clean and long-lasting. Plus, you can create some really interesting design elements with tile. It’s also moderately priced, giving homeowners the most bang for their buck in terms of quality and longevity. Pros Water-resistant Low-maintenance Lots of design options Cons Very hard, which makes it uncomfortable to stand on for long periods of time Can be cold Time-consuming and laborious installation Install Cabinetry Even if you’re handling the renovation yourself, consider hiring a professional to install cabinets for you. The last thing you want is to get your cabinets up and start refilling them only to have them fall down or to realize you didn’t level them properly. A professional will make sure the cabinets are installed properly. If you haven’t been working with a kitchen designer to figure out what kind of cabinets you want, here are a few styles you should be aware of: Shaker Style Shaker cabinets are classic and fit with many styles. The key element of these cabinets are the doors which have a middle panel that is set back from the trim that surrounds the edges of the door. “Shaker style cabinets are very in right now,” says Hales. “Whether you’re doing a farmhouse flip, classic craftsman or full-modern design, a shaker style is timeless, providing depth-of-field and has a good weight to it.” Low Cabinets Many homeowners like the look of high ceilings with cabinetry reaching all the way to the top, but it’s not the most practical placement in many kitchens. Nancy Valent, president of NMV Strategies says low cabinets are becoming more popular. “Low cabinets allow for easy access and sturdy pull out drawers for pots and pans,” advises Valent. Open Shelving Floating and open shelving is trending in homes across America. This design concept is loved by many designers as well, because it allows you to use your well-designed kitchenware as décor. Reiner says, “With floating shelves as uppers, you open up the visible and perceived space in the kitchen by doing away with bulky enclosed cabinets. This look is especially great for modern, contemporary, bohemian and transitional styles.” So not only will exposed shelving showcase your kitchenware, it can also open up the space visually. Place The Countertops You’re getting so close! Your kitchen is finally starting to look like a kitchen again and not a construction zone. Next up: your countertops. One thing to keep in mind about your countertops is the timeline. This is where things can sometimes slow down because many designers prefer measuring for countertops once the cabinets are installed. This is especially important to note if you’re ordering fabricated countertops like quartz. To decide which countertop material is right for you, take a look at the options below: Granite In recent years, no material stood a chance against granite. It was the be all and end all of kitchen counters. It’s still popular, but with the upgrades made to other materials, it’s not the only high-quality option. Pros Durable Comes in a variety of colors and styles Visually appealing Cons More expensive Porous, which means it needs to be resealed often Quartz “Quartz countertops are a low-maintenance opinion, perfect for any busy kitchen,” says Valent. Quartz is a very strong material, and when mixed with resin, makes countertops nonporous, stain-resistant and easy to clean. Unlike granite, marble or concrete countertops, you don’t have to worry about sealing, conditioning or polishing a quartz countertop. Pros Durable Nonporous Easy to clean Versatile, with countless colors, textures, styles and shapes Cons Can be damaged by chemicals like bleach Not heat-resistant Expensive Laminate Laminate countertops get a bad rap, but they are cost-effective, especially if you’re trying to stick to a budget. Pros Least expensive countertop option Easier installation than other materials Variety of colors and finishes Cons Easily damaged Low resale value Short-lived Enjoying Your New Kitchen Renovating your kitchen can be a long process, but it’s worth it in the end. Whether you’re renovating to sell or to build the perfect kitchen for your dream home, you’ve put in the work and now it’s time to relax. If you’re planning a kitchen remodel, call today! Original Post: https://www.rockethomes.com/blog/homeowner-tips/guide-to-remodeling-kitchen Miranda Crace

It’s pretty understandable that when it’s time to sell, getting offers for the right amount is your top priority. Doing strategic fixes and updates can get you right where you want to be – getting generous offers without wasting your money on improvements that do little to entice potential buyers. When you’re repairing your home to sell, it’s important to consider all the improvements that are most important to buyers and you should channel your budget into repairs that will benefit you the most. First of all, fixing to sell means offering a home that you would want to live in yourself. If you’re trying to sell your property “as is” with scratched floors, a questionably functional HVAC, or broken appliances, you will likely receive low-ball offers that are figuring the cost of the improvements post-purchase in mind. To avoid selling for less and missing out on a huge chunk of the profits, as a homeowner you need to find solutions to make the fixes so you will offer a product that is above reproach. Have in mind that not all renovations have an equal impact on what your home is worth. In this article, we’ve compiled a list of seven important home repairs and updates that you should do before putting your property on the market. Fix Damaged Flooring Damaged-up wood flooring, outdated carpeting, and tired linoleum make your home feel sad. While facing such flooring, buyers might take just one step inside and scratch the property from their list. Do you want to increase the value of your home before putting in on the market? Install new flooring, because buyers don’t want to deal with replacing carpet. According to a report by Zillow, floor repairing is an improvement that 26% of the homeowners make before they sell. If your property got lots of rooms with different types of flooring, you might want to bite the bullet and invest in new flooring for all, in order to create a seamless feel throughout the house. Have in mind that wood floors and even faux-wood floors are preferable to carpeting even though those options are more costly. If your property already has hardwood floors, a fine refinishing will get the job done. Repair The Windows And Doors If you think that selling a home, complete with creaking windows and outdated doors that don’t really open and close properly after decades of use is an easy task to do – think again. Many people list their property thinking that no one will notice the malfunctioning windows and doors just because they look pretty. In most cases, potential buyers are going to open and close windows and doors and learn that something is not right. Ignoring basic repair work before you put your place on the market can do a lot of damage in return. Buyers might suspect that other hidden items in the house haven’t been kept up either, so make sure you address this issue on time. Paint The Walls Painting your walls is the lowest cost improvement with the highest rate of return, so almost 40% of home sellers choose to do it before potential buyers arrive for their first visit. A nice coat of neutral paint can give the entire house a facelift, and buyers love to see freshly painted walls. You might get color recommendations from a trained professional because paint colors can be tricky depending on lighting and other house features or check our our other blog on selecting the right paint colors! Landscape The Yard The yard of your house is a buyer’s first impression of the whole property when they initially pull up. An overgrown or patchy yard can be a major turn-off. Anything that’s overgrown should be cut back, and anything that’s dead should be removed. Do not list your house before you make sure that the lawn is refreshed and green by re-sodding or planting grass seed, and you may even want to do edging to define clear spaces in your garden. Bathroom Remodel Another way to get a great return on investment is by doing a mid-range bathroom update. Besides, a bathroom that looks old and rusty can really date a house. Depending on your budget, you can do a lot of repairs and upgrades in your bathroom such as new countertops, tiles, frameless glass doors, new cabinets, or even new fixtures for the sinks and tub. If you are not interested in replacing the tiling, have in mind that dated tiles always look better with clean grout lines, so cleaning or freshening the grout may also work. Update The Lighting Lighting is another house improvement that might be done on a smaller budget and make a big impact when appearance is concerned. While updating the lighting in your house, remember to keep colors consistent with your home’s hardware. You can mix meals such as oiled bronze and copper, or chrome with brushed nickel, but you shouldn’t mix gold and silver tones for instance. Older brass fixtures look dated since they were often used in properties built in the past century. If you decide to put in something new, make sure it offers a true update. Revive An Outdated Kitchen Even though buyers love a fresh look, a full kitchen renovation is rarely worth it when it comes time to sell your house. And yet, kitchens are one of the most important rooms for buyers. If you are updating the space just for the sale, focus on low-cost high-impact projects only. Updating the hardware, or installing new countertops, or painting the wood cabinets could do the trick. Final Thought Consult with us today on the most important repairs by picking projects that do more than look pretty and are cost-effective. Pick the right updates to get your house in selling shape and justify a higher asking price. Original Post: https://realtybiznews.com/7-important-repairs-to-make-before-selling-your-house/98758670/ Jaime Richardson

So you’ve renovated your house like a skilled surgeon, fixing structural flaws and preserving each room’s distinct architectural character. But something’s still missing. More than likely, that something is color—the renovator’s secret weapon. Did you know that crown molding can visually raise the ceiling or lower it, depending on how it contrasts with the walls? Or that deft use of color can turn one room into a lively gathering place and another into a relaxing space for curling up with a book? In today’s open-plan homes, where kitchens, living rooms, and dining rooms are often one large space, color is used to help define interiors and create focal points in relatively featureless rooms. The trick, of course, is figuring out how to pick paint colors to use and where to put them. How To Choose Interior Paint Colors 1. Create a Color Scheme That Matches Your Home’s Furniture In a world where thousands of colors can be yours for just $25 a gallon, it pays to consider the advice of architectural color consultant Bonnie Krims. “Always remember that while there are thousands of paint chips at the store, there are only seven colors in the paint spectrum,” says Krims, referring to red, orange, yellow, green, blue, indigo, and violet (what Color Theory 101 students are often taught to remember by the mnemonic device, “Roy G. Biv”). “I always suggest eliminating a couple even before you go to the paint store.” Here’s her sure-fire 4 step method for creating a color scheme: Pro2Pro Tip: If you find yourself paralyzed at the paint store, unable to choose your color sample cards, Krims offers this tip: Look at the darkest color at the bottom of the strip. “If you can live with the one at the bottom, you know you’ll like the middle and top, but if you choose by looking at the top, lightest colors, all the cards in that category start to look the same.” Start by selecting three colors from an existing object in your home. “Take a pillow from the family-room sofa, your favorite tie or scarf, or a painting—anything that conveys comfort or has an emotional connection for you—and take that object to the paint store,” says Krims. “Find three sample strips with those colors, and you instantly have 15 to 18 colors you can use, since each sample strip typically contains six paint colors.” The next step is to choose one of the three paint colors as your wall color and to save the other two to be used around the room in fabric or furnishings. To choose the colors for adjacent rooms, take the same original three color sample strips and select another color. Finally, choose a fourth color that can be used as an accent: “Splash a little of that color into every room of the house—by way of a pillow or plate or artwork. It makes a connection between the spaces,” Krims says. 2. Decide on the Finish to Create an Appealing Visual Effect Once you have your colors in hand, consider the finish you’ll be using. Though today’s flat paints have increased stain resistance, conventional wisdom has long held that a satin (also called eggshell) finish is best for walls because it is scrubbable and doesn’t draw attention to imperfections. Semi-gloss and high-gloss finishes, it was thought, were best left to the trim, where they could accent the curves of a molding profile or the panels of a door. Today, however, finishes are also being used to create visual effects on the entire wall. Paint one wall in a flat or satin finish and the adjacent wall in a semi-gloss, both in the same color, and “when the light hits the walls, it creates a corduroy or velvet effect,” says Doty Horn. Similarly, you can paint the walls flat and the ceiling semi-gloss to achieve a matte and sheen contrast. Keep in mind that the higher the gloss, the more sheen and the more attention you draw to the surface. Used strategically, color and gloss together can emphasize your interior’s best assets. 3. Match The Color To The Feeling You Want In The Room Colors evoke an emotional response. In general, cool colors (blues, greens, and clean whites) are perceived as restful and soothing while warm colors (like red, orange, and yellow) create a sense of drama and energy. Cool colors are calming in private rooms—like the ice-blue that covers the walls in this bath; warm colors are a good way to enliven social spaces. The psychology of color is a minor obsession among paint professionals. Many say you should choose a color based at least in part on how a room is used and the mood you want to establish. Maxwell Gillingham-Ryan, co-founder and editor of the blog apartmenttherapy.com suggests, painting social rooms (dining rooms, kitchens, family and living areas) warm colors like daffodil-yellow, coral, or cranberry, and give private rooms (home offices, powder rooms, bedrooms) cooler hues like sage-green, violet, or sky-blue. Keep in mind, when it comes to emotional effect, of course, one person’s welcome-home orange will be another person’s signal to scram. Debbie Zimmer, for one, declares that “red will increase your appetite—and your blood pressure; blues and greens are naturelike and calming; purple is loved by children but not necessarily by adults; yellow is inviting; and orange can be welcoming but also a little irritating, depending on the tint, tone, or shade.” Research done by Behr indicates that yellow can stimulate the brain, so it might be worth considering for rooms where homework is done; but avoid yellow in bedrooms, where the goal is generally to chill out. Instead, explore these calming colors in the bedroom to help you sleep better. 4. Know Your Whites Whites come in a staggering variety. Pure, “clean” whites are formulated without tinted undertones. These are favored by designers looking to showcase artwork or furnishings and are often used on ceilings to create a neutral field overhead. Most other whites are either warm—with yellow, rust, pink, or brownish undertones—or cool, with green, blue, or gray undertones. Behr’s Mary Rice says: “Use warmer whites in rooms without a lot of natural light, or to make larger spaces seem cozier.” Cool whites, by contrast, can help open up a space. Test several at once to see which one works best with the other colors at play in the room. 5. Create Flow in Open Plan Spaces Open plan living room and kitchen with gray and blue interior paint colors. Using the same gray in the open-plan adjoining living room unifies the two spaces. The simplicity of archways with no casework pulls in the view of the next room rather than framing it. Photo by Karin Melvin Continuity is important on the ground floor, but color can help “zone” a big open space, separating the dining area from the TV room, for instance. There’s no need to stick to a single color or even a single color palette that is either all warm (reds, oranges, yellows) or all cool (blues, greens, bright whites). However, “by using muted, dustier values, there’s a better chance the colors you choose will flow into one another,” says Tami Ridgeway, a color stylist for Valspar. She recommends leaning toward colors softened by a bit of gray; these are often found in historical palettes. Bright colors can be injected in small doses as accents—in furnishings, floor coverings, even flowers. 6. Make Small Spaces Feel Bigger or Cozier What Colors Make A Room Look Bigger? Generally, crisp whites can make a space feel bigger and more open, while warm colors create a sense of intimacy. At the most rudimentary level, large rooms generally can handle more color than small rooms. “Lighter hues can open up a small space, while darker colors give the perception that the surfaces are closer than they are,” says Debbie Zimmer. 7. Using Color Architecturally One of the most effective ways to use color to transform a room is to play up its architectural features. Molding, mantels, built-in bookcases, arched doorways, wainscot, windows, and doors all offer an opportunity to add another layer of interest to colored walls. Painting Molding and Doorways For subtle emphasis, Sheri Thompson, director of color marketing and design for Sherwin-Williams, suggests painting molding or doorways just one step lighter or darker than the primary wall. “It’s a subtle shift in color but it really brings your eye to the detail,” she says. Painting a metallic glaze right on top of an existing painted element, like a ceiling medallion, is another way to draw attention. “A copper or bronze finish is very translucent and it gives a nice shimmer that enhances the architectural feature,” says Thompson. Two color interior walls with living room painted yellow and kitchen walls painted red. One way to give adjoining rooms in ground-floor living areas a harmonious look is to paint them in colors with the same undertones, like the yellow-based red, khaki, and pumpkin used here. Keeping trim color consistent from room to room helps avoid any jarring transitions. Private areas that typically remain closed off from view—home offices, bedrooms, and powder rooms, for example—don’t need to tie in as closely with their neighboring spaces. Where Do You Switch Color When Moving From Door to Casing? It’s not an open-and-shut case, but the rule of thumb goes something like this: Paint the face of the door the color of the trim in the room it faces when shut, and the edges of the door the same color as the trim in the room it swings into. If you’re using different trim colors in adjoining rooms, they need to work well together. “Doors tend to stay open, so you’ll have the trim color from an adjoining room in any given space on a regular basis,” observes painter Susan English. So, let’s say you have a barn-red door opening into a room with pale yellow walls. “This can be an effective accent color in the space where it doesn’t ‘belong’—if it’s carefully considered.” Keeping trim color consistent in adjoining rooms that have open entryways generally offers a sense of cohesiveness, providing an unbroken line that is pleasing to the eye. In an open plan, consider painting all the trim white, even where wall colors vary. 8. Exploring Using Two Different Colors in The Same Room For a bolder approach, try using two different colors in the same room. For example, paint a built-in bookcase or niche a shade of green in a room with blue walls, which will highlight the items on the bookcase or inside the recessed area. Of course, architectural elements can also provide continuity throughout a house if they are painted the same color in every room. Starting in the Federal period and continuing today, white and off-white have been the traditional choice for molding, windows, and doors. 9. Create Contrast in Rooms with Wainscoting A room containing wainscot provides a good opportunity for a contrast between light and dark. A dark wainscot below a bright wall will draw attention to the upper walls, while a bright white wainscot next to a colored wall will focus the eye on the wainscot. You can also use paint to create the effect of wainscot where it doesn’t exist by covering the bottom third of the wall in one color and the upper walls in another; then place a piece of flat molding along the intersection and paint it the color of the lower wall to reinforce the wainscot look. 10. Create An Accent Wall to Add a Focal Point Where rooms are relatively featureless, painting an “accent wall” in a vivid hue where the others are white or neutral can add a dramatic, contemporary edge. Or, as Ken Charbonneau, a New York color marketing consultant, suggests, paint the primary walls a soft color such as beige or celadon green and the accent wall three shades darker. “The accent wall still gives the room some punch, but it’s not as dramatic.” 11. Explore Bolder Options with Multiple Colors If drama is your goal, you might rethink the entire notion of painting a wall from corner to corner, says Doty Horn, director of color and design for Benjamin Moore, and you’ll create an architectural emphasis where one doesn’t exist. Moving around the room in a clockwise direction, try painting a third of one wall and two thirds of the adjacent wall, wrapping the corner in color. Then paint the last one eighth of the second wall and three quarters of its adjacent wall, covering that corner. Another bold play: Take a big wall and, working in from both corners, paint it almost to the center, leaving an 18- to 20-inch vertical line of white space, and hang artwork down the center. 12. Treat Your Ceiling Like a Fifth Wall Kitchen with white wainscot, brown dining table, and interior walls and ceilings both painted red. Painting walls in complementary colors, like the deep red and gray-green at left, and furnishing with neutral hues of similar intensity creates a harmonious look. Red walls make this large dining room more intimate, while highlighting the white wainscoting and trim. Red overhead also lowers the ceiling visually, making the space feel cozier and more convivial—a plus in a room designed for conversation. Photo by Susan Seubert To give low ceilings the illusion of height, paint them white and any crown molding the same color as the wall; this will keep from interrupting your gaze upward. Though sticking to “ceiling white” generally makes a space feel airy, a similar effect can be achieved by painting the ceiling a lighter shade of the wall color. Just take the paint sample card that has your wall color as the middle choice, then go one or two choices lighter for the ceiling color. The result will be a room that appears larger, because the contrast between wall color and ceiling color has been softened. In a small room, such as a bathroom, the ceiling can even be painted the same color as the walls to make it look bigger. Of course, sometimes lowering the ceiling visually creates a welcome feeling of enclosure. In his own 19th-century brownstone, Ken Charbonneau painted the dining room ceiling Pompeiian Red. “People love to ask if the red paint doesn’t bring the ceiling down too much. But you’re sitting the whole time you’re in a dining room, and you want to create a warm, cozy, intimate feeling, so why not?” Of course, his ceilings are 11 feet high. In a house that has ceilings just 8 or 9 feet high, painting a bedroom ceiling a pale robin’s egg blue, for instance, would be a way to create a similar, soothing effect. 5 Paint Color Selection Mistakes To Avoid 1. Being Afraid To Explore Interior Paint Color Options “The world is divided into two groups—the color courageous and the color cowardly,” says New York color marketing consultant Ken Charbonneau. “People who live in colorful interiors have gotten over the fear of making a mistake.” The best way to get over that fear is to always start with a color you love—from a rug, a painting, a fabric. Then test it on the wall. If it’s too strong, consider asking your paint store to formulate it at “half-strength” to lighten it or to tone it down by adding more gray. 2. Putting Too Much Paint On The Walls Be aware of the intensity of the colors in a room. “If you have an Oriental rug with five or six strong colors, don’t paint the walls in equally strong hues. Let the rug be the focal point and the walls a lighter color,” says Sherwin-Williams’s Sheri Thompson. 3. Putting Too Little Paint On The Walls If you think your room is boring, look at it in terms of the 60-30-10 rule that designers employ. What is the 60 30 10 decorating rule? Sixty percent of the color in a space generally comes from the walls; 30 percent from upholstery, floor covering, or window treatments; and 10 percent from accent pieces, accessories, and artwork. Translation: Liven up those white walls. 4. Rushing The Paint Selection Process Home entryway with interior walls painted yellow. The paint chip strip is only a guide. To really see how a color will look on your walls, paint a large piece of foam-core board with it, then move it around the room for a few days. Different lighting will affect how it looks over the course of the day. While yellow looks cheerful in this sun-filled space, a similar warm color used in a room that gets no natural light can quickly start to look dingy. The best way to find a color you can live with is to paint a 4-by-4-foot swatch on the wall and live with it for at least 24 to 48 hours so you can see it in action. The size of the room, the amount of natural or artificial light, and competing elements—ranging from flooring to furnishings—can all affect the way a particular color is perceived. “Taking the extra time to do the swatch test is worth it to find a color you’ll love living with for years,” says Benjamin Moore’s Doty Horn. A number of paint companies sell small jars of paint for sampling: Use one to paint a big piece of foam-core board with your top choice. Place it in various spots around the room, and see how it reflects the upholstery and responds to the quality and amount of light in the room over the course of a few days. 5. Forgetting About Primer When changing the color of a wall, primer (white or tinted) is vital to getting the actual color you picked out. Michael Baillie, paint sales associate at The Home Depot, says, “Priming ensures there will be no interference from the previous wall color.” Call us to paint today! Original Post: https://www.thisoldhouse.com/painting/21015206/how-to-choose-the-right-colors-for-your-rooms Jill Connors

Simple Tricks for Keeping Your Crawl Space Dry and Clean As the old adage goes, prevention is better than cure. Crawl space problems that affect your health and structure of your home can be avoided with a few proactive maintenance and protective practices, a few of which have been outlined below. 1. Keep Moisture Out Moisture control is one of the first steps towards having a safe and clean crawl space. As pointed out in The Washington Post, the ground beneath and around your home contains moisture, which ideally, should evaporate back into the atmosphere. When this fails to happen, the moisture can collect into visible water droplets. But the real problem happens when this water accumulates near wood, causing mold and mildew to grow. If left alone, the mold can be bad enough to compromise the structural integrity of your home. Good moisture control begins outside the building envelope. For example, gutters are a relatively small investment that can work wonders by directing water away from your home’s foundation. If gutters are impossible or impractical, you can also try landscaping the soil outside the house such that it slopes to direct water away from the building. 2. Inspect and Clean the Interior of Your Crawl Space Once you’ve eliminated all external sources of moisture, you can then proceed to inspecting the crawl space itself. If you have exposed dirt floors, you should consider sealing it with a moisture retardant like polyethylene. In a guide for the National Post, writer Mike Holmes notes that crawl spaces with dirt floors can lead to problems caused by humidity. Dirt floors can also be infested with bugs. Regular cleaning will also help keep the crawl space dry and moisture free. If the crawl space has already been “infected” with moisture-caused mold, a professional cleaning service may be necessary to fix the problem. This is especially true if you have a pool of stagnant water in the crawl space, which calls for a perimeter drain. 3. Block Out Rodents and Ventilate After cleaning your crawl space, the next step is keeping it clean. You can start by making sure any potential entry points for rodents are blocked off. Watch out for small cracks and seams, which—while looking deceptively tiny—are large enough for mice and roaches. At the same time, you want to make sure your crawl space still has enough ventilation to let it “breathe.” Ventilation in the form of laminated water vapor barriers are excellent solutions for allowing crawl spaces to vent, while still keeping pests out. 4. Insulate the Crawl Space After installing your vents and water vapor barriers, you can then proceed to installing insulation. Fiberglass batts are by far the most common and popular insulating solution for crawl spaces, and can be install between floor joists. While effective, you might want to consider pairing fiberglass batts with spray foam insulation, although more expensive, spray foam insulation can create a super tight seal against heat transfer and air movement. A thin layer of spray foam can be enough to fill in the nooks and crannies of your crawl space, which, when paired with the cheaper fiberglass, can keep warm air in and cold air out, and vice versa during the summer. Spray foam also works wonders against moisture damage and mold growth because it’s impermeable to moisture. Proper insulation not only regulates the temperature of the crawl space, it also helps insulate the rest of the home. During summer and winter, uninsulated crawl spaces are one of the biggest culprits for burgeoning utility bills caused by HVAC systems working harder to fight warm or cold air from escaping from beneath the floor. If you’re wondering about the condition of your home’s crawl space, get a safe and comprehensive crawl space inspection from RW West Consulting and Inspection Services. We offer a full set of crawl space repair and maintenance services, perfect for homeowners looking to evaluate or spruce up their homes before putting on the market. Post reprint from: http://www.rwwestinspections.com/crawl-space-maintenance-tips/10903/ View original article
